Publicado el

How to inspect your semi tires before drives

How to inspect your semi tires before drives

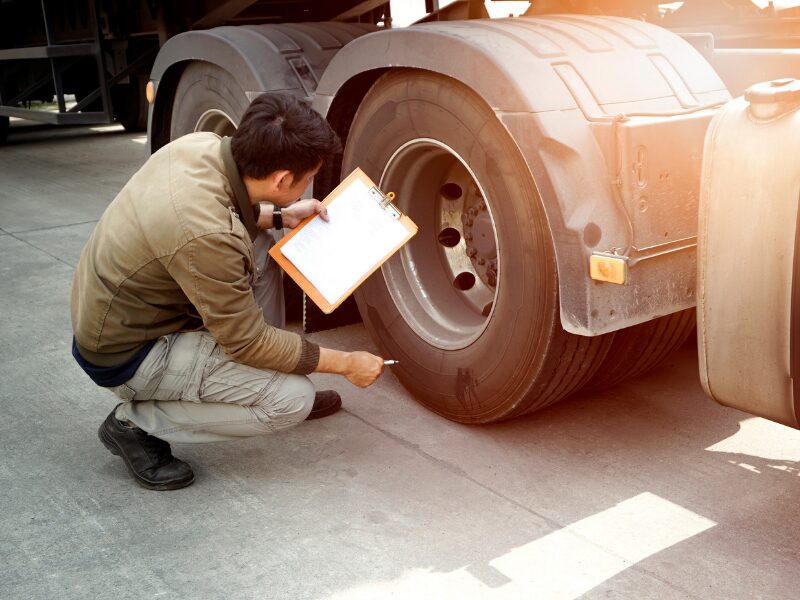
A blown commercial tire on the highway is more than just a minor inconvenience. It can cause a dangerous accident, tear up your trailer, and cost thousands of dollars in emergency repairs and missed delivery deadlines. Because tires are the only part of your truck in constant contact with the road, keeping them in top condition is essential for every journey. Learning how to inspect your semi tires before drives is one of the most effective habits you can build as a driver or fleet owner.

A thorough pre-trip tire check takes only a few minutes, but it protects your safety, keeps your fuel efficiency high, and helps you pass Department of Transportation inspections without issues. Catching low air pressure, uneven tread wear, or a deep sidewall cut while parked gives you complete control over the repair, saving you from a high-speed emergency on a busy shoulder.

Checking air pressure with a reliable gauge

Many drivers rely on a wooden club or hammer to thump their tires, but hitting a tire only tells you if it is completely flat. A tire that has lost thirty percent of its air pressure often feels almost identical to a fully inflated tire when you hit it with a thumper. To perform an accurate test, you should always use a calibrated digital or dial pressure gauge.

Always measure tire pressure when the tires are cold, meaning your truck has been parked for at least three hours or driven less than two miles. Rolling down the highway generates friction, which heats up the air inside the tire and causes higher pressure readings. Compare your gauge reading against the recommended inflation pressure listed on your tire sidewall or the spec plate inside your cab.

Steer tires generally require higher air pressure, often around 110 PSI, while drive and trailer tires usually run around 100 PSI depending on your load weight. Running on underinflated tires creates excessive heat buildup, which weakens internal rubber layers and leads to sudden blowouts. Overinflated tires reduce your grip on wet roads, cause a rough ride, and wear out the middle of your tread quickly.

Measuring tread depth and spotting wear patterns

Tread depth determines how well your tires grip the pavement, channel away water, and bring your heavy rig to a stop. Federal safety regulations state that steer tires must have a minimum tread depth of 4/32 of an inch in every major groove. Drive tires and trailer tires must maintain at least 2/32 of an inch of tread depth across all primary grooves.

Using a dedicated tread depth gauge gives you precise numbers that a simple visual check cannot match. Measure the tread in several spots across the width of the tire and around its entire circumference. Tires rarely wear down perfectly evenly, so taking multiple readings ensures you do not overlook a dangerously thin area.

As you measure, pay close attention to unusual wear patterns. Faster wear along the outer edges means the tire is consistently underinflated, while heavy wear down the middle points to overinflation. If you notice cupping, flat spots, or diagonal wear lines, your truck may have alignment problems, worn shock absorbers, loose wheel bearings, or unbalanced wheels. Fixing these mechanical issues early prevents you from ruining a new set of tires prematurely.

Need fast on-site tire service or emergency roadside help? Call us for 24/7 support.

Examining sidewalls, valve stems, and wheel hardware

After checking pressure and tread depth, conduct a careful visual inspection of the entire tire body. Examine both the inner and outer sidewalls for deep cracks, cuts, rubber degradation, or visible cord fabric. If you spot a bulge or bubble in the sidewall, the internal steel belts have failed, meaning the tire can burst at any moment under heavy cargo weight.

Look closely at the space between your dual tires on the drive and trailer axles. Rocks, wooden blocks, or metal road debris often get wedged between dual wheels. Left unchecked, these objects rub against the rubber sidewalls continually while you drive, eventually causing a double blowout. Use a pry bar or heavy tool to dislodge trapped objects before moving your vehicle.

Inspect your valve stems, valve caps, and wheel rims to complete the check. Ensure every valve stem has a firm cap installed to keep road dirt, salt, and moisture out of the valve core. Check your rims for cracks, dented flanges, or missing wheel weights. Look for rust streaks spreading outward from your wheel studs, as rust trails are a clear warning sign that a lug nut is loose and backing off the hub.

You might be interested in: Everything you need to know about DPF cleaning

What to do when you spot a damaged tire

If your pre-trip inspection reveals a tire with low tread, a dangerous sidewall bulge, or an unfixable air leak, do not risk driving on the highway. Rolling out with a known tire defect places you at immediate risk for an out-of-service order during a roadside inspection and endangers everyone sharing the road with you.

If you are parked at a fleet yard, truck stop, or distribution center, contact a mobile tire repair service before hitting the highway. Modern mobile service trucks carry heavy-duty jacks, commercial tire mounting tools, and replacement tires right on board. Having a mobile technician swap out a damaged tire in a parking area is far safer, faster, and cheaper than dealing with a blowout at high speeds.

Making tire checks a non-negotiable part of your daily pre-trip routine protects your equipment, keeps your driving record clean, and ensures you arrive at every destination without costly delays.

To get more information about us, follow us on Facebook and Instagram. Or call us right now for a road service on: repairtrucktrailer.com
Publicado el

Guide to emergency parking on highway shoulders

Guide to emergency parking on highway shoulders

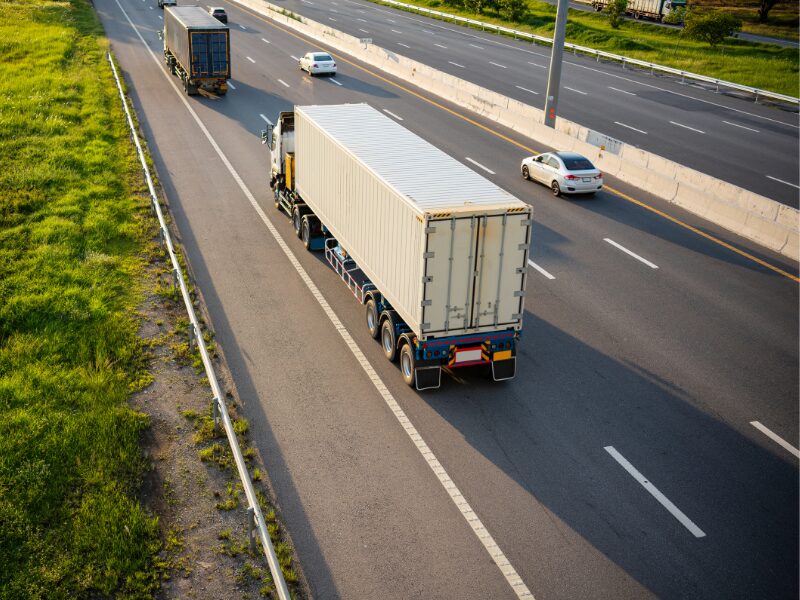
Pulling an 80,000-pound semi-truck off an active travel lane is one of the most stressful situations a commercial driver can face. When an engine component fails, a tire blows out, or air pressure drops unexpectedly, you often have only a few seconds to react. Knowing the proper steps for emergency parking on highway shoulders keeps you, your cargo, and passing motorists safe from dangerous secondary collisions.

A highway shoulder is a high-risk environment. Cars and other commercial vehicles travel past your stopped rig at high speeds, and passing drivers are frequently distracted. Treating every shoulder stop with extreme caution is necessary from the moment you pull off the pavement until you merge back into traffic. This guide covers how to choose a safe spot, set up required warning devices, and manage your vehicle while waiting for help.

Evaluating when to pull over vs. pushing to an exit

Not every mechanical warning requires an immediate stop on a narrow highway shoulder. Before pulling off the road, quickly assess whether your vehicle can safely travel a short distance to reach an exit ramp, rest area, or weigh station. Parking at a rest stop or parking lot is always much safer than standing on a highway shoulder.

If your engine is overheating rapidly, your steering feels loose, or a tire has shredded completely, you must stop immediately. However, if you have a minor air pressure leak or a non-critical sensor light, driving at a reduced speed to the next exit reduces your exposure to passing traffic. Balancing immediate mechanical needs with location safety is the first critical decision you must make during an emergency.

If you must pull over, look ahead for the widest section of shoulder available. Avoid stopping on bridges, narrow overpasses, blind curves, or steep downgrades whenever possible. Finding a wide, flat, paved shoulder gives you and any arriving mechanics a much safer work area.

Step-by-step protocol for pulling off the highway

When an immediate roadside stop is unavoidable, executing a smooth pull-off prevents rear-end collisions. Turn on your hazard lights right away to inform drivers behind you that your vehicle is experiencing trouble. Do not slam on your brakes suddenly. Slow down gradually while checking your side mirrors to monitor traffic in the lane next to you.

Steer your rig as far onto the right-hand shoulder as possible. Try to leave maximum space between your driver-side wheels and the fog line that marks the active lane. If a clear grass embankment or flat gravel edge permits, getting extra inches away from live traffic lowers the risk of getting sideswiped by passing vehicles.

Once your truck stops completely, set your parking brakes and shut off the engine. Keep your hazard lights flashing to maintain visibility, especially during nighttime hours, heavy rain, or thick fog. Turn your steering wheel toward the right. If another vehicle hits your rig from behind, your truck will be pushed away from active lanes rather than into oncoming traffic.

Setting up emergency warning devices correctly

Federal regulations require commercial drivers to place emergency warning devices within ten minutes of stopping on a shoulder. Your reflective triangles or warning flares alert oncoming traffic early, giving distracted drivers time to adjust their lane position safely.

On a standard two-lane highway with traffic moving in both directions, place one triangle ten feet behind your trailer on the traffic side. Place a second triangle one hundred feet directly behind your truck in the center of the shoulder. Place the third triangle two hundred feet behind your truck in the center of the shoulder to give early warning.

On a one-way highway or divided interstate, adjust your placement slightly. Put one triangle ten feet behind the rig on the traffic side, a second triangle one hundred feet back on the traffic side, and the third triangle two hundred feet back toward oncoming traffic. If your view is blocked by a hill or sharp curve, move the furthest triangle up to five hundred feet back to alert drivers before they round the bend.

Need expert roadside repair for your commercial vehicle? Call Fast Service to connect with 24/7 technicians ready to assist you on the road.

Staying safe inside or outside the cab while waiting

Deciding whether to wait inside your cab or step outside depends entirely on your immediate surroundings. If your truck is parked on a wide, paved shoulder with plenty of distance from live lanes, staying inside your cab with your seatbelt buckled is generally the safest option. The heavy steel structure of your cab provides substantial protection if a passing vehicle clips your trailer.

If your rig is stuck on a very narrow shoulder, close to a sharp curve, or in a high-collision zone, staying inside can be dangerous. In these tight spots, exit the vehicle through the passenger door away from active traffic. Put on your high-visibility reflective vest and walk far back behind the guardrail or up an embankment, away from the flow of vehicles.

Never stand directly behind or in front of your truck while parked on a highway shoulder. If another vehicle strikes your trailer, your truck will move forward instantly, crushing anyone standing in its path. Always stay alert, watch oncoming traffic, and keep a clear escape path in mind at all times.

You can also read: What to Do in Case of a Truck Accident?

Communicating your location to roadside mechanics

When calling for mobile truck repair, giving clear location details helps technicians reach you quickly. Note the exact highway name, travel direction, nearest exit number, and mile marker. Look for landmark signs, bridge overpasses, or nearby mile posts to pinpoint your exact spot for dispatchers.

Describe your parking situation accurately to the service team. Let them know if you are on a wide paved shoulder, a narrow gravel edge, or blocking part of a travel lane. This information helps the service provider send the right support vehicles and take extra safety precautions upon arrival.

Mobile mechanics carry heavy-duty warning lights, safety cones, and specialized tools to work safely in roadside conditions. By staying clear while the technician sets up their work zone, you allow them to perform diagnostics and repairs efficiently and safely.

Looking for reliable roadside support in Florida? Explore our complete repair services to see how our mechanics keep your fleet moving safely.

Resuming highway travel safely after repairs are complete

Once repairs are finished and your truck is ready to roll, getting back into active traffic requires patience and caution. Do not pull directly from a standstill into a high-speed travel lane. Use the shoulder as an acceleration lane to build up speed before attempting to merge.

Turn on your left turn signal, check your mirrors constantly, and wait for a clear gap in traffic. Accelerating on the shoulder allows your heavy rig to match the speed of oncoming vehicles, making your merge much safer for everyone on the road.

Collect your reflective triangles only when you are completely ready to depart. Store them securely in your cab kit so they are ready for the next emergency. Taking these extra steps ensures a safe transition from a dangerous shoulder stop back onto your delivery route.

To get more information about us, follow us on Facebook and Instagram. Or call us right now for a road service on: repairtrucktrailer.com